
Written by Dylan Bates
November 7, 2026
Replacing deck boards over an existing frame is often sold as a re-deck, but the estimate still depends on the condition and layout of everything beneath the surface. The framing may be structurally sound and ready for new decking. It may also need joist repairs, added blocking, connection upgrades, or partial replacement before the first new board can be fastened.
The estimator's job is to separate what can be confirmed during the site visit from what will remain concealed until demolition. A clear scope gives the homeowner a useful price while protecting the contractor from carrying unknown framing repairs inside a flat re-deck number.
Start With the Decking System the Homeowner Wants
The replacement material controls several framing decisions. Record the exact product line, board profile, installation direction, fastening system, border layout, and stair-tread plan before deciding the existing frame can stay.
Composite and PVC products have manufacturer-specific limits for joist spacing, stair-stringer spacing, board overhang, end support, gapping, and fastening. A frame built for thicker wood decking does not automatically support a thinner composite board at the same spacing. Diagonal decking commonly requires closer joist spacing than boards installed perpendicular to the framing. Picture-frame borders and breaker boards require solid support wherever board ends and fasteners land.
Use the current installation instructions for the selected product. Do not carry a spacing requirement from another brand or an older product line into the estimate. If the homeowner has not selected a product, state the framing assumptions behind the price and identify which selections would require a revision.
Inspect the Frame Before Pricing It as Reusable
Look at every area that is visible from below and at the deck perimeter. Record the joist size and on-center spacing, beam size, post arrangement, bearing points, ledger condition, stair framing, rim condition, and visible connectors. Check whether the deck is freestanding or attached to the house.
Pay close attention to locations that hold water or receive repeated wetting. Joist ends, beam tops, post bases, stair stringer cuts, ledger connections, and areas beneath planters often deteriorate before the middle of a framing member. Probe questionable wood where appropriate and document softness, splitting, fungal growth, insect damage, failed fasteners, or corrosion.
A visual visit does not confirm the condition of every concealed surface. The top of a joist can look intact from below while holding decay around old fastener holes. A ledger may be hidden behind siding or flashing. Beam plies may conceal damage between them. State those limitations in the estimate instead of treating accessible observations as a complete structural inspection.
Photograph the deck before demolition and keep the images with the job. The same process described in How Contractors Should Document Pre-Existing Damage Before Work Begins gives the office and crew a record of what was visible when the scope was written.
Check the Plane, Not Only the Strength
A frame can be strong enough to remain and still produce a poor finished surface. Long composite boards make crowns, low joists, twists, and inconsistent spacing easy to see. The old wood decking may have hidden those differences because shorter boards were pulled down with face fasteners or because the surface had weathered unevenly.
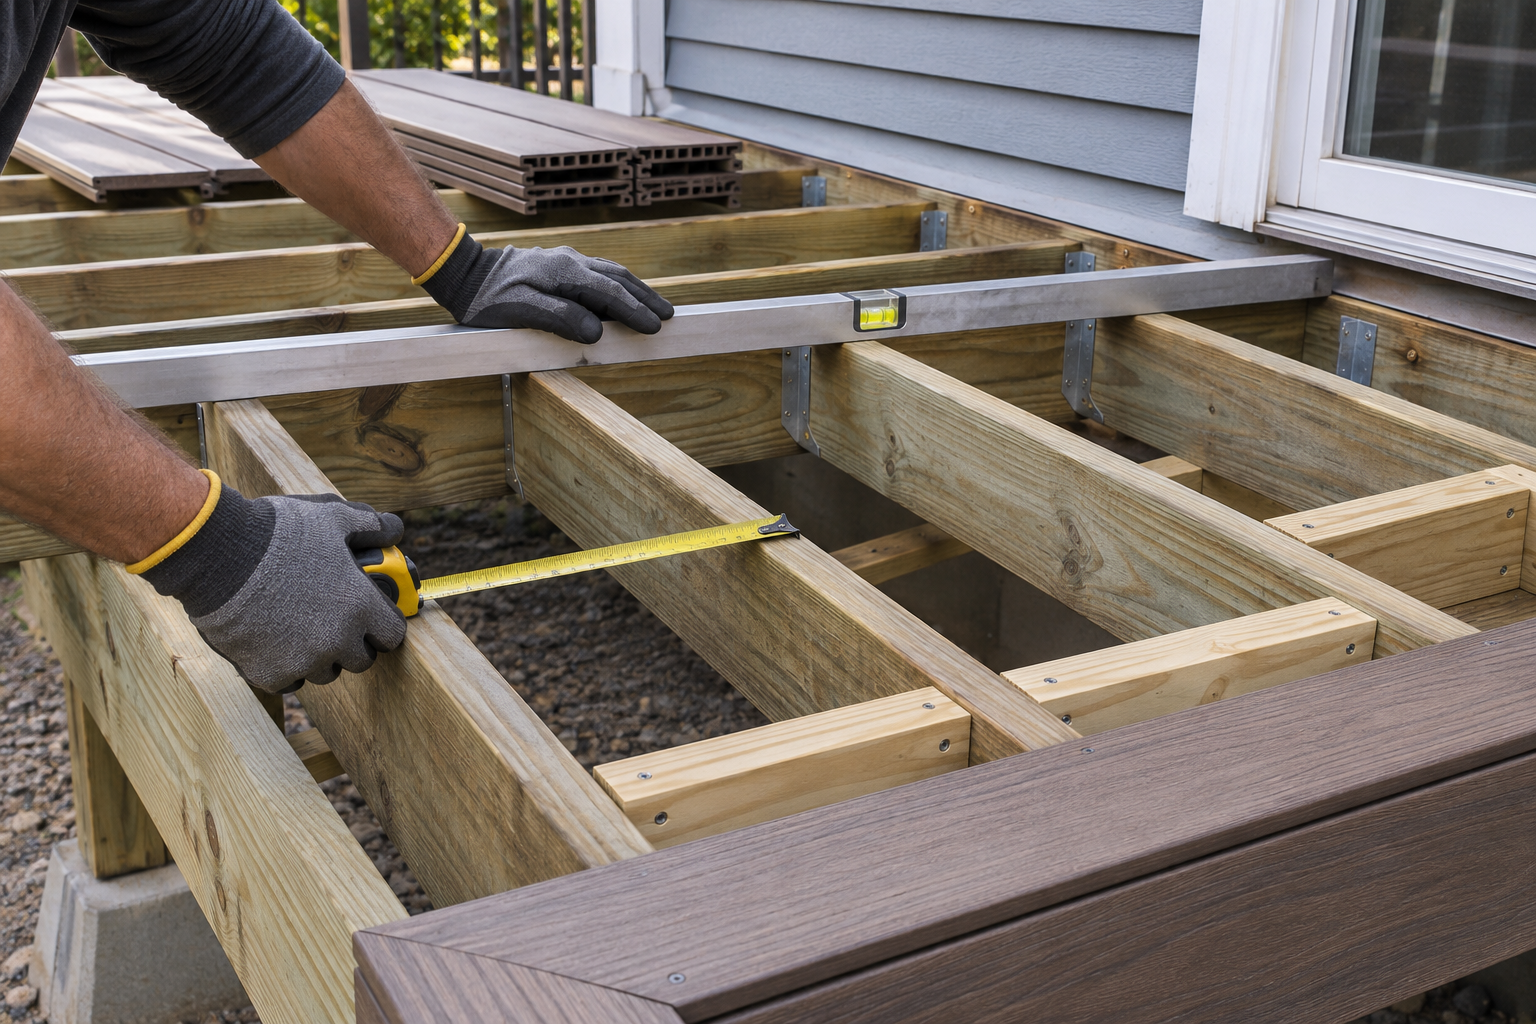
Place a long straightedge or string line across the joists in several directions. Record the amount and location of correction required. Some joists can be planed within acceptable limits. Low areas may need approved sistering or furring methods that do not create water traps. Twisted or badly crowned members often need replacement.
Include this correction as a defined scope when the condition is visible. If the deck surface prevents a reliable check, describe how correction will be measured and priced after removal. Leaving the crew to solve the plane board by board slows production and makes the finished lines inconsistent.
Lay Out Borders, Breaker Boards, and Stairs Before Demolition
The finished board layout determines where blocking belongs. Draw the decking direction and border pattern before pricing labor and material. Mark where board ends meet, where hidden fasteners need clearance, and how the border returns around posts or stairs.
Picture framing often requires more than adding a single block at the rim. The fastener system may require a wider fastening surface, paired framing, or specific clearances at butt joints. Breaker boards need continuous support and can change the cut lengths across the entire deck. Railing posts also compete for space with border blocking and fasteners.
Stairs deserve their own layout. Verify stringer spacing against the selected tread product, inspect the stringer cuts and bearing, and confirm how the new tread thickness changes the finished rise. A different decking thickness can affect the first or last riser enough to create a code problem. Include skirt boards, risers, nosing details, landings, and guard connections in the takeoff rather than treating the stairs as a simple square-foot extension of the deck.
Separate Surface Work From Structural Work
Write the base scope around the conditions you can reasonably confirm. That may include removing and disposing of the existing decking, pulling or cutting old fasteners, cleaning the framing, completing defined plane corrections, adding specified blocking, installing joist protection where included, and installing the new deck surface.
Keep structural repairs in a separate section. List known repairs individually when their extent is visible. For concealed conditions, use a clear pricing method such as an installed unit price for joist replacement, a linear-foot price for sistering, or an agreed labor-and-material rate. The method should explain what authorization is required before additional work proceeds.
A concealed-condition clause is not a substitute for a careful inspection. It covers areas that could not be verified without demolition. It should not be used to move obvious repairs out of the original estimate.
Review Connections and Water Management
New decking does not correct a weak ledger connection, missing flashing, undersized hardware, poor post bearing, or an improvised beam connection. Review the visible load path from the decking through the joists, beams, posts, and footings. When the deck is attached to the house, inspect accessible ledger fasteners and flashing conditions. Local code and permit requirements determine whether existing components can remain and which upgrades are required.
Fastener compatibility is part of the scope. Pressure-treated lumber, coastal exposure, pool chemicals, and other corrosive conditions affect connector and fastener selection. Replacement hardware should be compatible with the treated wood and exposure. Do not mix metals in a way that encourages corrosion.
Consider how the rebuilt surface will drain and dry. Protecting joist tops may extend the service life of framing, but tapes and membranes must be installed according to their instructions and should not trap water at connections. Board gapping, ventilation, grading below the deck, and flashing at the house all affect moisture performance.
Build the Estimate Around Actual Production
A re-deck is not priced accurately by multiplying deck area by an installation rate. Demolition speed changes with fastener type, board condition, access, deck height, and disposal distance. Pulling screwed-down boards is different from cutting corroded fasteners between boards and joists. Working around an existing railing takes longer than clearing an open platform.
Break labor into phases the crew will actually perform: site protection and setup, selective demolition, debris handling, framing inspection, approved repairs, layout and blocking, surface preparation, decking installation, stairs, railing work, and cleanup. Use production records from completed jobs to set the hours. How Contractors Should Build Production Rates From Real Crew Hours explains how to turn those field records into estimate inputs.
Access affects every phase. A second-story deck with a narrow side yard requires different handling from a low deck beside a driveway. Include the time to move long boards without damaging them, stage material, lower demolition debris, protect landscaping, and make supplier or dump runs.
Order Material From the Layout
Calculate net decking area first, then build the order around board lengths and the actual pattern. Borders, breaker boards, stairs, and stagger requirements determine which cutoffs can be reused. The same square footage can require a different board count when the orientation or stock length changes.
Include hidden fasteners, plugs, color-matched screws, fascia fasteners, joist protection, blocking lumber, connectors, and repair material. Confirm whether fascia boards are decorative or expected to cover structural rims, and verify the manufacturer's required spacing and fastening.
Do not apply a single waste percentage without checking the cut plan. How Contractors Should Build Material Waste Into an Estimate covers the difference between net quantity, installation waste, and avoidable loss. Deck boards with capped surfaces, directional grain, fixed plug locations, or limited stock lengths need a product-specific takeoff.
Account for Permits, Engineering, and Inspection
Permit treatment for a deck rebuild varies by jurisdiction and scope. Replacing deck boards in kind may be handled differently from changing materials, replacing structural members, altering stairs, or modifying guards. Check the local requirements before representing the work as permit-exempt.
If the existing deck falls outside current prescriptive requirements, the local authority may require specific upgrades or a design professional. Heavy loads such as hot tubs, outdoor kitchens, and large planters should not be added to an existing frame based on appearance alone. Define permit fees, drawings, engineering, and correction work in the estimate so the homeowner knows what is included.
Write Assumptions the Crew Can Use
The estimate should give the field team a workable handoff. State which framing components are intended to remain, which visible repairs are included, what product and layout were priced, and which conditions will be reviewed after decking removal.
Useful language is specific: “Price includes replacement of two damaged joists at the south edge and new blocking for the perimeter border shown on the attached layout.” Vague language such as “repair framing as needed” creates an open-ended obligation and gives the crew no stopping point.
Explain how concealed damage will be documented and approved. After demolition, photograph the exposed frame, mark the affected members, and give the homeowner the repair price before covering the work. Keep that approval with the project record.
Confirm the Scope Before Material Arrives
Before ordering, confirm the final product, color, board direction, border layout, stairs, fascia, railing scope, permit responsibility, and known framing repairs. Verify supplier lead time and inspect deliveries before the crew depends on them.
A well-written re-deck estimate gives the homeowner a firm price for the visible and selected work without pretending concealed framing has already been verified. It also gives the crew enough detail to correct the frame, install the product according to its requirements, and keep additional repair decisions documented.
Find Your Next Residential Project
Create a HeyPros for Contractors account to browse available homeowner projects and choose the leads you want to pursue.
Related reading:
How Contractors Should Build Material Waste Into an Estimate
How Contractors Should Build Production Rates From Real Crew Hours
How Contractors Should Document Pre-Existing Damage Before Work Begins
Contractors looking for new homeowner projects can explore available leads and opportunities at HeyPros.
